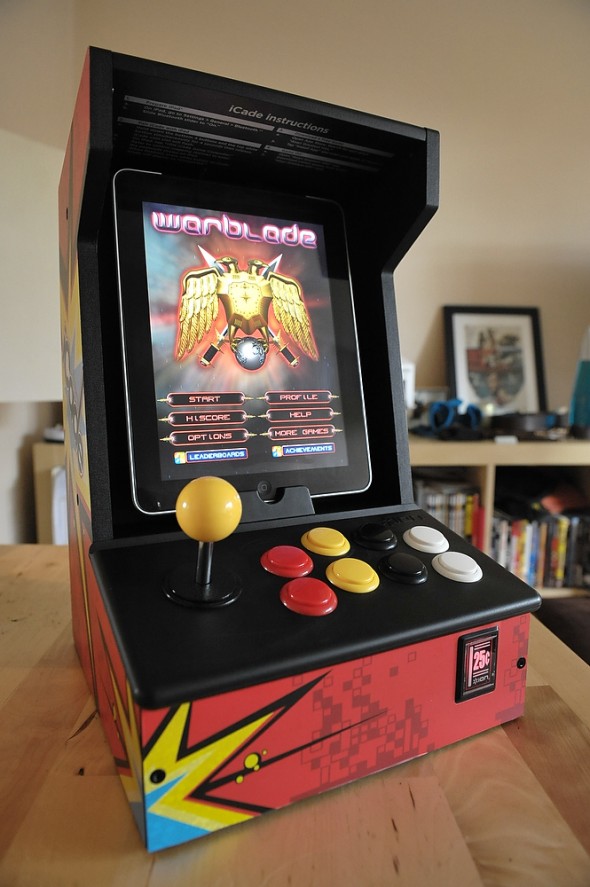
A couple of days ago I wrote about my new iCade and how much fun it is, but that I don’t like the stiff, clicky buttons or the way the stick can slip into the diagonal directions too easily. The parts I ordered to improve the experience have arrived so in case you fancy trying the same thing, here’s a guide on how to fit them; click on any photo to enlarge it.
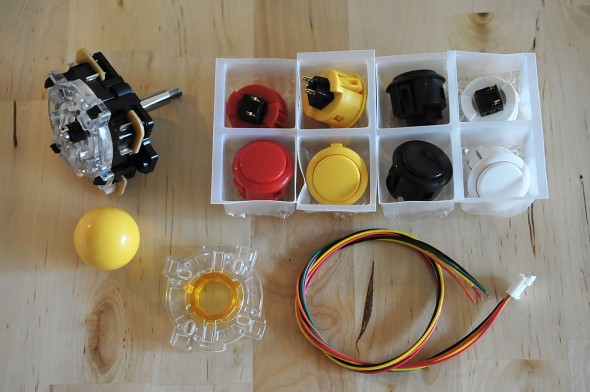
The new parts
Clockwise from top left I have:
- Sanwa Ball Top Joystick JLF-TP-8Y – I went with Pac Man yellow for my ball top, but the original red iCade ball will fit too. Make sure when ordering that you don’t get the widely-available 8YT version as that comes with a metal plate attached which is apparently a pain to remove. If you’re interested in what the letters and numbers in the name mean, there’s a good explanation in this Shoryuken forum post.
- 8 x Sanwa Snap In Pushbuttons OBSF-30 – these need a 30mm hole in the control panel to fit them whereas the iCade stock buttons are 28mm so you’ll need to widen those holes a little with sandpaper or a sanding tool. They have a slightly convex top and are far quieter with a much lighter tap required to trigger them. The lip around the buttons is pretty much the same size as the stock buttons so they should all fit okay. I went with red, yellow, white and black to match the iCade’s panel designs (didn’t fancy blue).
- 5 Pin Joystick Cable JLF-H – one end plugs neatly into the new joystick. The other ends will need to be attached to the wires that currently run from the circuit board to the stock joystick, either by soldering or using a screw terminal. I went with the latter because I’ve never soldered anything in my life.
- Sanwa Octagonal Restrictor Plate GT-Y – this is the ‘gate’ that restricts how the joystick moves. The joystick actually comes with a square gate that can be rotated 45 degrees (see my iCade review) but I’ve read that octagonal is the way to go for total control.
Total delivered from Gremlin Solutions: £50.36. Birthday, remember?
You’ll also need a few tools:
- the hex allen key that came with the iCade (or similar)
- Phillips screwdriver
- small flathead screwdriver (if you’re using a screw terminal)
- possibly a Security Torx screwdriver – my iCade control panel had two Security Torx screws but I read that other modders had no such screws in theirs. I guess Ion changed the design at some point. Security Torx heads are like regular Torx heads but with a pin in the centre that requires your screwdriver to have a hollow tip.
- soldering kit or 5-way screw terminal
- sandpaper or a Dremel sanding tool
- a cable tie
Let’s get cracking
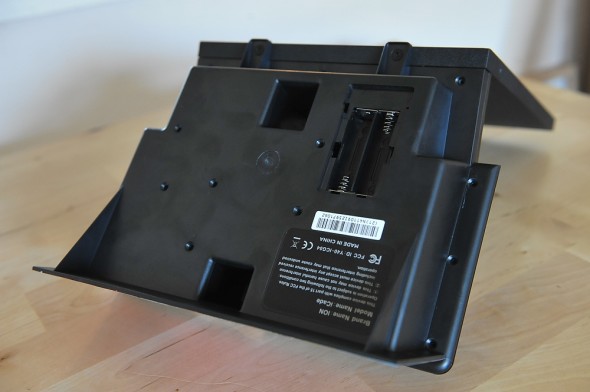
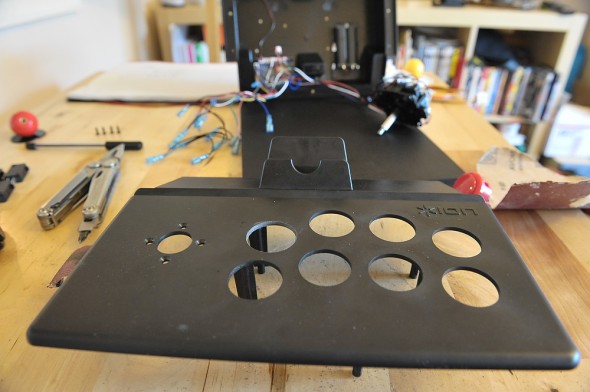
First we need to open the control panel. Remove the sides of the iCade and turn the control panel upside down to reveal the screws you need to remove.
There’s 16 in total, including those pesky Torx screws (if you don’t have them it’s just 16 Phillips head screws). Keep them in a dish!
Then rest the iCade on it’s back and lift off the panel carefully.
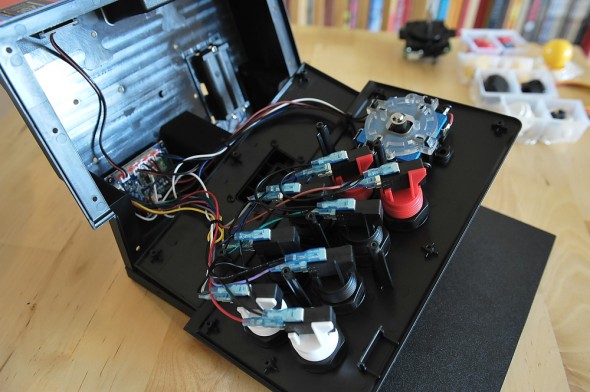
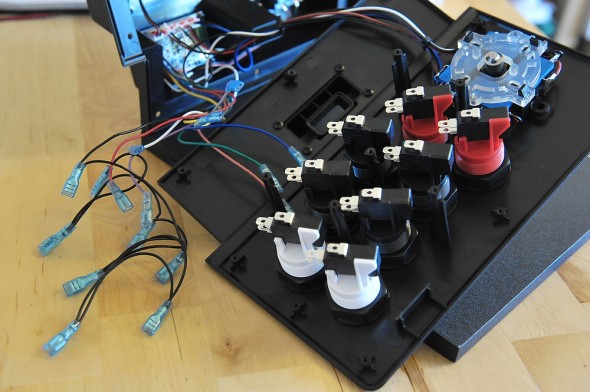
You need to remove the wires from the switches but before you do so draw a diagram of the underside of the board and note which coloured wire is attached to each button; they all have one black ground wire as well, you don’t need to note that.
Mine were tough little buggers to remove and nervous sweaty hands didn’t help, so I used my Leatherman pliers to grasp the necks of the metal clasps and tug firmly.
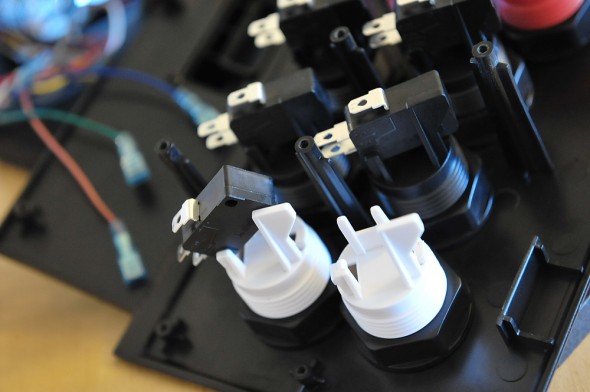
The black switches need to be removed next. Pull gently on the tall strut holding each in place and you can wiggle them out easily.
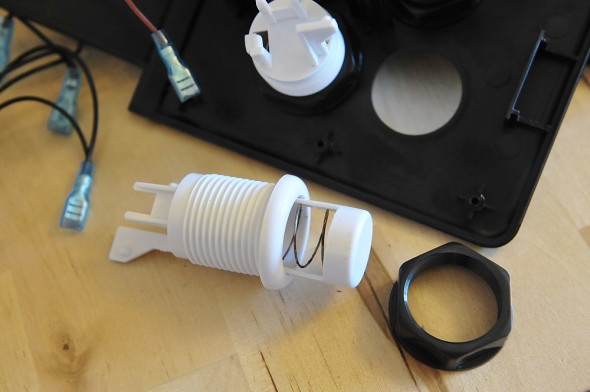
Finally unscrew the nuts and slide the buttons out; some of those blighters are tight but rest assured that none are glued on even though it bloody well felt like it.
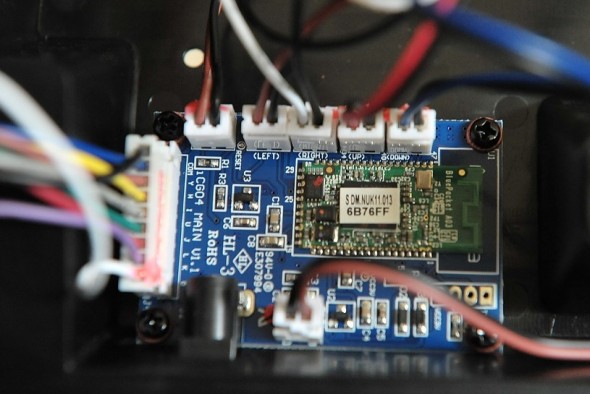
Before you remove the joystick, take a look at the iCade’s circuit board; where the joystick wires are attached there should be the directions printed in tiny lettering on the actual board. If so, great. If not (highly unlikely) then before removing the stick take a note of which of the coloured wires is attached to each directional switch on the stick.
Now pop the ball and dust protector off, remove the four screws and keep hold of them for later; then slide the stick out and cut the wires as close to the switch connector as you can so you have some spare when soldering/connecting.
The new buttons need a wider hole, by a couple of millimetres. I have no sanding tools so I got some sandpaper and did it by hand which was easy enough but took me about an hour, and boy did my wrist hurt the next day.
You’ll also need to sand the hole for the stick by a millimetre or so, to fit the lip at the base into it.
The buttons clip in easily; make the re-wiring easy on yourself by aligning the buttons so the switches beneath line up the same way. Then, looking at the buttons so SANWA is printed the right way up, clip the appropriate coloured wire onto the left contact and the daisy chain of black wires onto the right contact.
The joystick is a little trickier. Technically it doesn’t matter which orientation you mount it so long as you connect up the wires appropriately, but our hand is forced because we need enough room to clip on the 5-wire bundle safely. The best position is to have the stick connector (or PCB) facing the iPad, towards the back of the case.
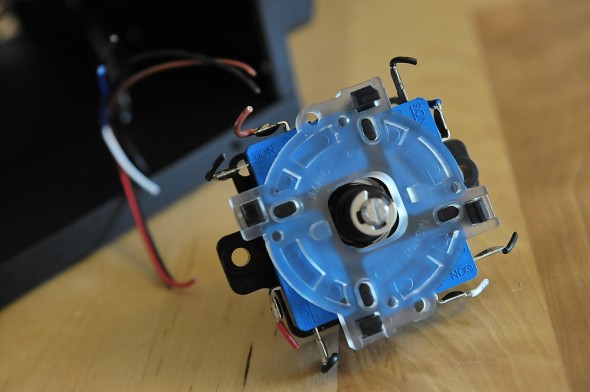
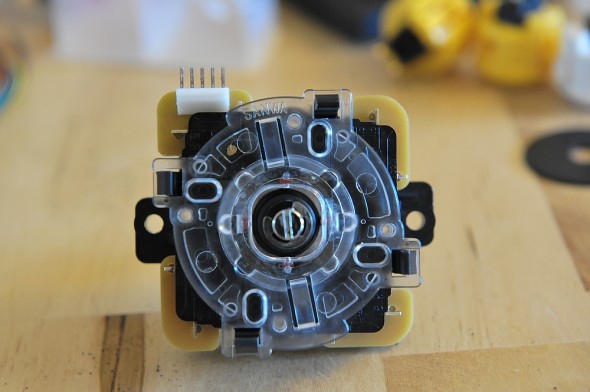
However, if we just rotate the entire stick to achieve this, the iCade’s screw connector gets in the way of the stick’s plastic moulding; you can see them sticking out either side in the first image below. Therefore, we have to mount the base with the protruding mouldings top and bottom. That would place the PCB on the left or right side, so we have to rotate that as well, to take account of the stick mount rotation.
Don’t worry, it’s easy 🙂
Unclip the existing square gate from the stick (again, note that this gate can be rotated forty-five degrees into a 4-way stick if you prefer). The PCB and four switches are all one piece and can be lifted off together, rotated ninety degrees and replaced. Then attach the octagonal gate (or your original if you’re happy with that) and you’re done.
Position the stick so the PCB faces up towards the back of the case, making sure the mounting ring sits properly in the widened hole, then attach it with the four screws that held the original stick.
Nearly there! All that’s left is to connect the directional wires to the 5-wire bundle. It’s best not to clip it on just yet, so that you don’t risk pulling on wires while making the joins.
Because we rotated the connector and the switches, we need to re-map the directions and as luck would have it there’s a brilliant guide to doing just that available here, which for ease of reading I’ve reproduced below with full credit to the original creator, rtdzign.
The guide shows the view of the stick from beneath. With our PCB in the top position we want the bottom left picture. I have a Sanwa stick so on the 5-wire bundle I need to connect yellow to the UP wire, green to DOWN, red to LEFT, orange to RIGHT and black to ground.
You’ll have noticed there’s 4 black ground wires coming from the circuit board. As the stick uses a common ground you only need to use one of those four, doesn’t matter which; you should tape up the ends of the others so there’s no chance of metal contact in the future. I’ve read of people merging all four into one and connecting that, but I preferred the simpler way.
I used a screw terminal but if you fancy a spot of soldering then you might like this soldering guide on the Touch Arcade forums.
So, got your wires all connected up? Time to clip them onto the PCB and then fire it all up and make sure it works.
And assuming it does, you’re done! I got it right first time, thankyouverymuch 🙂
Grab a cable tie and tidy up that bundle of joystick wires, then tuck everything in neatly, make sure nothing’s trapped and start screwing the case back up, casually tossing into the bin any Torx Security screws you may have encountered along the way…
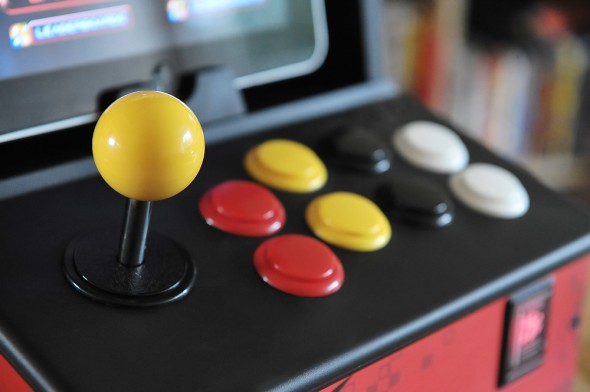
I have to tell you, the difference is huge. It was well worth the effort. Games like Pac Man, Silverfish HD, Hard Lines and Forget-Me-Not are so much more pleasurable due to the improved accuracy of the U/D/L/R directions with the octagonal gate; your high scores will improve, guaranteed.
The buttons are a different world. A feather-light press is all that’s needed and when hammered they make nothing like the cacophany the stock buttons do, plus you don’t feel like you’ve been for a workout. In something like Super Crate Box where reaction speed is key (thanks to the crazy big collision box around your character), the hair-like trigger on them is superb.
If you’re on the fence about trying this but fear of cracking the iCade open is holding you back, rest assured if I can do it, you can*.
Thanks for reading, and good luck!
* By the way please don’t hold me to that. It really is simple but if you’re disasterously bad at stuff like this and you go ahead and try it and screw it up by doing something stupid like cutting all the wires at the wrong ends or something, all bets are off and I will deny any legal responsibility to my claim that “if I can do it, you can”.
But seriously, you probably can.
UPDATE: a fellow iCade modder called Tom got in touch in the comments:
It was all going so well, up until it came time to attach the new joystick. The 4 original screws do not fit the new joystick, the holes are just slightly too large. I did purchase the same joystick, so I’m not sure what happened.
At first we thought this may be because some iCades appear to have been built slightly differently – the Torx screws don’t show up on every iCade, for example – but he got back in touch shortly afterwards by email to explain the solution:
It turns out that the screw holes on the joystick (both of them) are not threaded, they are just smooth holes. If you take the joystick apart, there are some hex nuts behind those smooth holes and that’s what the screws go into that secure it to the panel. It’s impossible to see this without taking the joystick apart. You may have mentioned this in your page, but I don’t recall seeing it. On the original joystick the nuts are glued inside the holes, so it takes a bit of work to get them out, but once you do, they fit into the new joystick no problem. Problem solved!
There were 2 nuts in each socket, so eight nuts total. I used a small socket and a hammer to get them out. Make sure the socket is big enough to not go into the threads.
I had the security torx screws too and managed to get them out with a very small straight slot screwdriver. There’s way you can leverage that nipple to actually unscrew it without having the tool, but again, you have to have a really small screwdriver.
He also included the following photo, adding:
You can see where the hex nuts would go quite easily in this pic. This is the old controller, inside view.
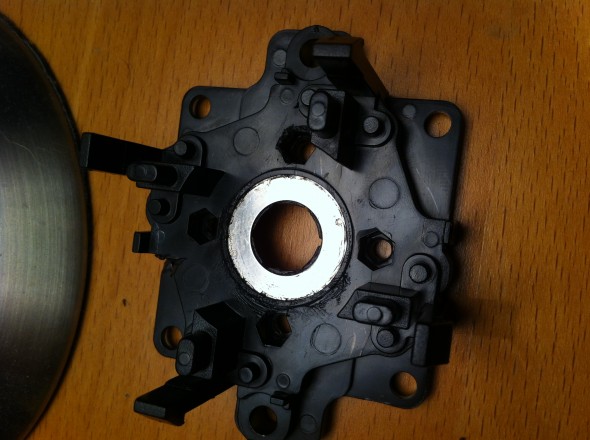
So if you’re having similar problems, hopefully this will help. Thanks, Tom!






60 replies on “how to customise an iCade stick and buttons”
Awesome ! I followed your tuto step by step. It’s easy and got it right the first time. Thank you for such crystal clear explanation.
You’re very welcome!
It was all going so well, up until it came time to attach the new joystick. The 4 original screws do not fit the new joystick, the holes are just slightly too large. I did purchase the same joystick, so I’m not sure what happened.
Oh man that’s so annoying. So the screws that came out of the iCade are smaller than the holes in the replacement Sanwa? I don’t think the Sanwa is likely to have changed design, so that means your iCade was made slightly differently to mine; not unusual in itself I suppose, as I read some people didn’t have security Torx screws to deal with whereas I did.
Hmm. So the holes in the iCade plastic panel, are they the same size as the holes in the Sanwa, or too small as well? If it’s just the fact that smaller screws were used for your original joystick I’m sure you can get 4 new ones that fit the Sanwa and just sand the iCade panel holes wider.
Let me know what you find out, and if you manage to sort it!
Tom’s issues all sorted out – see the update at the bottom of the guide for more info. Thanks, Tom!
So, did you use the same board that came with Icade? or did you replace that with a more PC friendly USB/Bluetooth board? only reason why I am asking is, the possibility of converting this iCADE into a full fledge MAME machine, but with an Intel NUC computer.
Hiya,
Nope, I only did what’s described in the post, no other changes.
Question–and I’m completely new to arcade modding–but why didn’t you go with the 24mm buttons? With an overall diameter of 28mm, wouldn’t those buttons fit perfectly without having to sand the board? Or do you simply prefer the full size buttons?
Hiya, thanks for getting in touch. Two reasons: 1) I wanted these particular buttons, and 2) the holes in the iCade are 28mm wide so a 24mm wide button unit wouldn’t be the most stable fit, especially when taking a hammering.
Plus it’s more fun doing it this way 😉
Thanks for the speedy response! I ordered the new clear 30mm Sanwa buttons, and my girlfriend ordered the stick, octagonal gate, and a different color ball top. She’s wonderful. Any chance you can dive into the settings and post a how-to for remapping the buttons? I would like the buttons to be: Top row=Select Start X Y, Bottom row=L R A B, but every time I attempt to make a change using just the iCade, the settings get messed up. Thoughts?
Hi Ken – which settings do you mean? I generally go with whatever is already mapped, they work pretty well.
A colleague of mine’s daughter managed to fry her Ion iCADE by feeding it 12V.
As far as I can see the only damaged component is the U2 SOT-23 smd element (a voltage rectifier/converter?) who released it’s smoke. It got so badly damaged I can only make out “253H” on the package.
This gives me no results in search engines.
Could you do me a favour and tell me what’s printed on that smd ?
Much obliged,
LeZandre
Hiya – we’ve chatted about this on email, just to update anyone who was reading these comments… 🙂
Hi, just wondering how the buttons actually fit back in and if you think the Sanwa OBSF-24 would work with the icade cabinet so I don’t have to make the holes bigger or would they be loose in the holes from the old buttons?
How much sanding was needed to make the 30’s fit?
Thanks.
Hi, the buttons clip into position when you push them into the holes. If you look at the very first pic you can see the clip on the yellow buttons – a little ridge just underneath the lip. There’s two per button, on each side of the underneath. I can’t remember if the 24mm buttons attach the same way but if they do that’s why you can’t really use them because the 2mm gap all the way around means there’s not enough black plastic for them to hold onto, they’d be a bit loose. I wouldn’t want to hammer on them during a Galaga sesh, put it that way!
As mentioned in the post it’s not hard to sand down the holes, it’s just a bit of effort if you do it by hand. Take a bit of rough grade sandpaper and spend an hour sanding 1mm off all the way round each hole, that’s all you need to do. Or you can get a Dremel sanding tool, but by hand is easy enough. The buttons will be nice and snug and you won’t have them slipping around.
Good luck! 🙂
^^thanks for the answer. Guess ill risk the sanding,
Quick question about the new stick whats the noise like from it? Is it quieter than the stock icade one?
I’m going to go with the new buttons and think I might change the stick too if its quieter.
Yeah the stick is a bit quieter but the reason I changed it is the octagonal gate. It’s so much more controllable than the square gate the stock stick comes with!
Thanks. You guide is great and its made me think *i can do it*
It’ll be a while before I get the new buttons and stuff but ill post back here after its done. 🙂
Excellent! Good luck!
Just an update, my buttons arrived yesterday and I jumped straight in and fitted them right away,
All went well, except I had the icade with security screws which were a pain to get out,
This guide was a great help in getting me through.
Only thing that none of the guides I read mentioned was the mess from making the holes bigger, I used a dremel and had little tiny bits of black plastic all over the kitchen floor. Guess it was obvious really,
Here’s a pic if the HTML works.
http://i1215.photobucket.com/albums/cc506/Oooooomonkey/image-51.jpg
Also just thought I’d say the buttons colours are blue , orange, purple, red to match the tmnt arcade cabinet as I’ll be fitting a tmnt custom skin to my icade soon.
Hi, great post! I was wondering if you could tell me how to add led arcade buttons and a led joystick. Your schematics are great for the wiring but how bout adding power to light up the controls? i’ve been trying to contact this guy to see how he did his.
http://rcaslis.xkill.net/tmp/icade_tease.jpg
If you know how, please let me know. Thanks.
Oooh, sorry, that’s out of my comfort zone I’m afraid! It does look fantastic though, if you get any details write them up and let me know, I’ll post a link!
Why not just install the octagonal gate onto an existing stick? It would be cheaper, and it looks like it would fit.
Also, did yo go with the ‘silent’ Sanwa stick, or the regular one?
The stick that comes with the iCade – at least, the one that came with my iCade – doesn’t have a removable gate. If you want to change the gate you have to change the whole stick first to one that allows a removable gate.
Not sure what the silent Sanway stick is, I just got the one listed. There’s audible clicks from the triggers but it doesn’t bother me as much as the clicks from the original buttons did!
Thans for all the help. I finally figured out how to customize my iCade. I feel satisfied. Couldn’t have done it without your help.
Gate looked removable from the photos you posted, that’s why I asked. http://i1.wp.com/www.myglasseye.net/news/wp-content/uploads/2012/01/iCade_046.jpg
I’m tempted by the silent stick as seen here: http://www.focusattack.com/sanwa-jlf-trg-8yth-sk-silent-microswitch-joystick/ but it has metal plate, and I don’t know how hard it is to remove it.
Wow! your page is just what I was looking for! Going to order soon, and will keep you informed about the progres.
I bought your same kit at the same dealer: that’s perfect!
Few days and i got it at home (I’m from Italy).
The new joystick and the new buttons give a super improvement to game performances.
Thx very much for your wonderful guide.
My Icade mode wip
http://dcnigma.tumblr.com/post/75154363872/my-other-pinball-project-wip-its-a-adm-pc-don-t
My iCade is quite similar of Owen’s one (torx screws included) but in effect I’ve got the same problem of Tom with the 4 joystick screws: I’ve solved with 4 wider screws, without sanding the holes, but only driving screws carefully, the holes came wider.
https://www.dropbox.com/s/96uho09p0tnb12n/01.jpg
https://www.dropbox.com/s/fveswyzhcr5176m/02.jpg
The joystick in the Icade Core have a removable square gate (similar to the image above) So recently I ordered a Sanwa GT Y octogonal gate and 8 OBSF 30 Sanwa Buttons for a total value of 26.82GBP. When It arrives I will post here the result. Thanks for the excellent tutorial.
I’m debating between buying the push-in buttons like you got, or the screw-in Sanwa buttons that are available also. Screw-in buttons seem like something that would never go wobbly, however, the push-in buttons are available in the ‘silent’ flavour. I’m curious if the buttons you got have any room to wobble, for example if the button hole is not perfectly cut?
Ok. I did it. I modified the icade 4way joystick with the octogonal sanwa gate. So easy that is imposible you didnt see it. Or maybe you didnt see it. Now you can delete this post too. Like you do with the other. Because you are the clever man. And this is spam for you.
Hi, I’m going to follow your tutorial (which is amazing) – – but I cannot for the life of me find a place that sells a 5-way terminals. Can I buy a 6-way terminal and just leave one of the slots empty? Help! Thanks in advance…
And by the way, i ordered everything exactly as you did except I got the concave style buttons from Ultimarc in the UK… I trust your advice on this…
Hi, yeah the terminals just need to have as many blocks as you have wires. Doesn’t matter if a few more, it’s just a bit of plastic and metal. 🙂 Sorry so late to reply.
After bookmarking this article 5 months ago(!) I finally got a chance to give this a go. I’m useless at anything DIY-related so this took me the best part of the day, but it was well worth the effort – personal highlight being the need to smash the hell out of the old joystick with a hammer in order to get a few hexagonal nuts out! Thanks so much for this awesome tutorial!
Next thing on the list is to create a groove on the inside of each side panel so the iPad can be slotted in landscape, just as this guy has done – http://www.youtube.com/watch?v=zwJifaSZF7Q has anyone had a go at this?! 🙂
Thanks for the excellent blog.
I replaced the square joystick restricter with an octagonal one. The difference is fantastic, and PacMan plays and feels like the arcade version.
Removing the clear plastic restricter is difficult. The guys down at Jaycar worked out there was a bit of glue there. The extra set of hands was almost essential in prying it off.
Thanks again for your inspiring blog.
You’re welcome Andy! Glad you’re happy with your new stick gate, it’s amazing the difference it makes isn’t it? 🙂
What screw terminal do I need. I know NOTHING about screw terminals. How do they work where do u put the screw terminal beside the 5 way switch? What volts? A picture Also. Thanks
Thanks so much now im gonna kill that Donkey kong world record 😉
@Owen Billcliffe I would like to mod my icade but need help in doing it. If your interested in helping me and making a little extra cash, Heres my email: ortega_0517@yahoo.com
Hope to hear from you(:
How much did this set you back?
I tried looking for this joystick you have posted & I’m not having and luck. Could you please send me some links? Thanks.
Great guide! I was able to swap everything out with better parts. My mod differed from yours slightly. I used a Sanwa with a 4-way restrictor (I only play classics) and I used Seimitsu buttons with silencers as the replacements. I figured I’d give them a try since I’ve never used them before. They are fantastic! I also added 2 pinball buttons on the sides. Love it!
Can u tell me where to get the 5-way screw terminal. Thanks.
Any electrical or hardware shop.
Finally finished my custom iCade with some new art and cuts into the sides to allow the iPad to sit in landscape mode – well worth the extra effort 🙂
http://www.pinterest.com/christoffah/turtles-arcade-custom-icade-for-ipad/
Thank you for the awesome guide. All went ok, with the most tedious bit being sanding down the holes to make way for the Sanwa components.
The difference is night and day, I was close to selling my icade as the original buttons and joystick were rubbish. I am glad I found this guide in time
Cheers
Ed
Anyone know the SIZE of the security torx? thanks!
Thank you so much for this. I was able to order all of the parts from SparkFun, and finally got around to the project this weekend. With your excellent instructions, I was able to get my iCade modded without too much hassle.
It did take awhile to sand the holes by hand, but I found that wrapping sandpaper around a wine cork and stapling it helped that process a bit.
I also had the hex nut problem, like Tom, but I was able to remove the square gate from the back of the original joystick to get them out, which I did by inserting the original screws and pulling them out with pliers. There were 2 hex nuts in each of the holes.
I think the joystick that came with my iCade and Tom’s must have been different from yours. I was able to remove the gate, and I could have just replaced it with the octagonal one I ordered. However, the replacement seemed just a little nicer, so I stuck with the plan.
I kind of miss the clicky action of the old buttons, to be honest, for retro appeal, but there is no question that the new buttons are better for gaming: faster, quieter, and less stress. The joystick is still pretty clicky though!
Played some Galaga last night and I am looking forward to trying Pac-man tonight.
If you can forgive a self-promotional footnote, I recently finished making a game specially designed for the iCade — I’d love it if you let me know what you think. It’s at http://vector-z.juggleware.com and I’ll send you a free promo code if you’d like!
Modded with all the same Sanwa parts. My joystick came with the correct nuts already, FYI.
Working perfectly!
Thanks for the blog.
No worries! Happy to help a fellow gamer 🙂
I read this guide and replaced the original square gate with the recommended Sanwa octagonal restrictor gate which fits the original icade stick very well, although I clumsily broke off one of the four fiddly plastic tabs that snap the gate in position (1 less tab is not critical thankfully).
My icade had no security screws. Better Luck!
The improvement is very noticeable for Pac-man, as the misdirections are very much less frequent after the modification, and as you say the high scores are much better! I believe the quality of play using the original stick plus an octagonal gate matches the experience of most playable cabinets from the 1980s, if not quite matching a true 4 way only solution like the namco/midway dedicated units. For Mame on icade, this is the best compromise for a do it all stick. Thanks.
Did you need to make an alteration to the spade connectors? I’ve got some buttons similar to yours and they seem to be a different sized connector. I’m not sure if they will stay on after some heavy use as they seem quite loose. I think they’re a couple of millimeters smaller than the standard ion connectors.
Great write-up. I’ve got my Sanwa buttons and J-Stik (Sanwa) joystick installed, along with a zero delay USB controller and Pi 3. Everything works in Emulation Station – I can navigate around with the joystick, the buttons work, etc. But as soon as I launch a rom, it stops working. For example, I launch a rom in MAME. The select and start buttons work, but not the joystick. I can pull up the menu inside MAME (tab key on my bluethooth keyboard while inside a rom) to configure the inputs, but the joystick doesn’t register when I try to re-set up/down/right/left. As soon as I exit out of the rom, the joystick starts working again. Any ideas?
I’m here only to thank you. I still have an icade and I decided to follow your guide. Unbelievable how better is now!
I’ve used Sanwa JLF-TP-8Y-SK Ball Top Joystick and I had the “nuts issue”. I also had the torx model.
However, thank you again, I had a good time!
Im here to thank you too. Great explanation, it made my iCade in a first class arcade cabinet. This is what sharing is all about. Really thankfull here!
I have a ION Icade Core unmodded and my joystick no longer works in the UP direction.
I was wondering if you know a direct replacement for it so I can open the Icade up and plug out the old joystick and plug in the new one without doing any soldiering etc
Hoping you can or someone else can help 😉